Emulating CRT visuals in RetroArch
03 Feb 2022Want to skip straight to the download and instructions? This way, please!
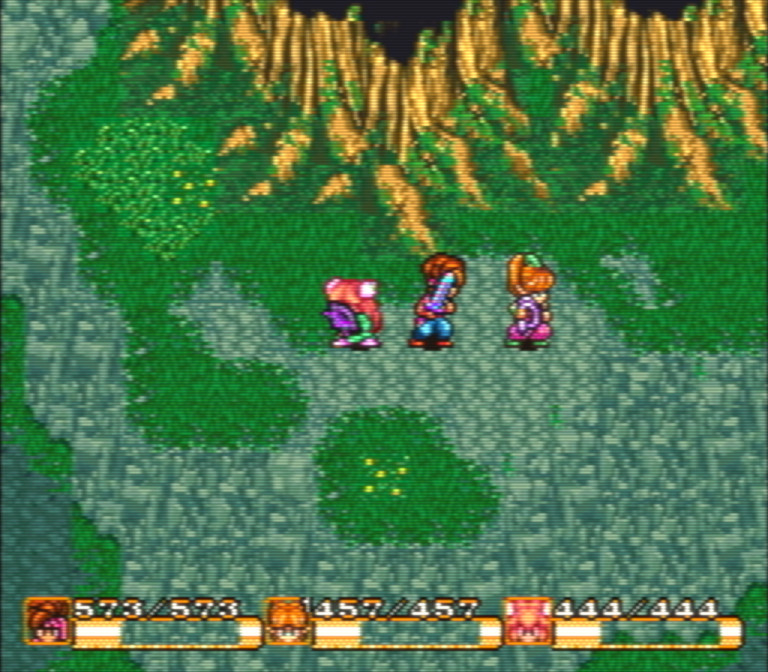
Pixel art is cool, and so are retro games. I love them both dearly. My favorite console from “that time” is the SNES. I regularly come back to some old classics to play them again, like The Legend of Zelda: A Link to the Past, Terranigma, Super Metroid and Donkey Kong Country. While emulating the SNES hasn’t been an issue for a long time now, I think one core aspect of the experience is often forgotten: emulating the look and feel you would get from playing these games on a CRT.
Nowadays we have liquid crystal displays (or even OLED) in pretty much every device that features a display. Back when consoles like the SNES were popular, however, this technology wasn’t readily available to consumers. In contrast to LCDs, where pixels are all (usually) quite crisp, consumer CRT monitors or televisions from the 90s all had a certain blur to it. I reckon some higher end devices could get pretty sharp as well, but my family did not have any of those :) The CRTs alone were not the only ingredient to this funky recipe, of course. TV signals back then were analogue, as opposed to digital. This is a whole different topic, and a large one at that. The important part is that with those analogue signals, the data going across had to be compressed, losing some information of the image in the process. NTSC was one of the three big standards used around the globe to encode analogue television data.
With NTSC being used in both the United States and Japan, it should be no surprise that many games from the SNES era seem to be “tuned” to NTSC’s visual artifacts. It would seem that the game developers (and especially artists) from those days specifically abused the quirks of NTSC to achieve some specific visual effects. But I think we can all agree that this has been enough boring introduction. Let’s get to the juicy bits!
Using shaders in RetroArch to emulate a CRT
In case you do not yet know what RetroArch is: it’s a frontend for multiple video game system emulators. Kind of like a media center. You have one central user interface that you then use to fire up an emulator (or core as they’re called in RetroArch) of your choice, and then a game, probably.
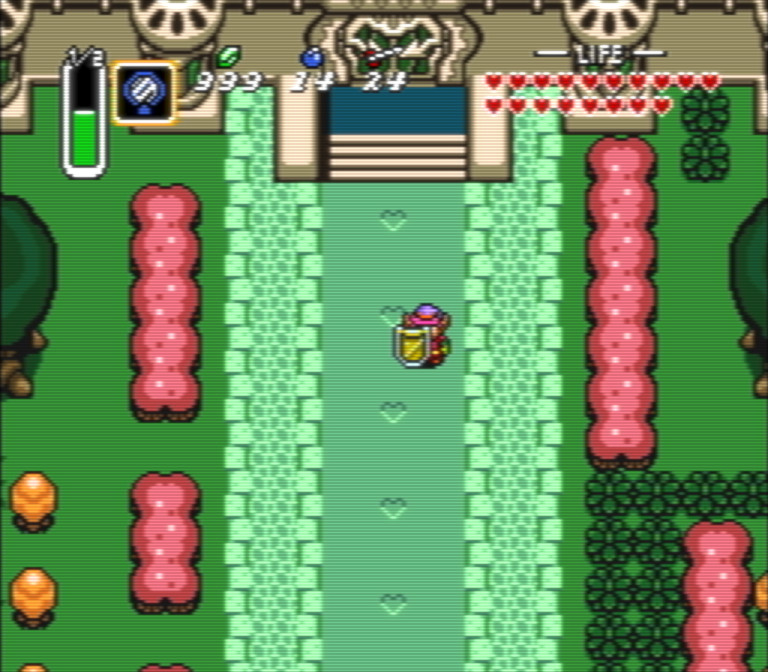
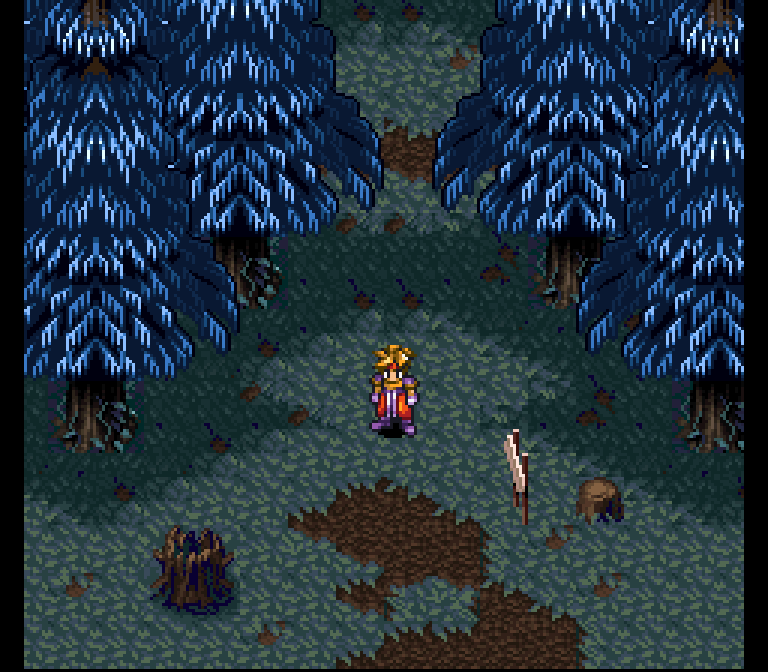
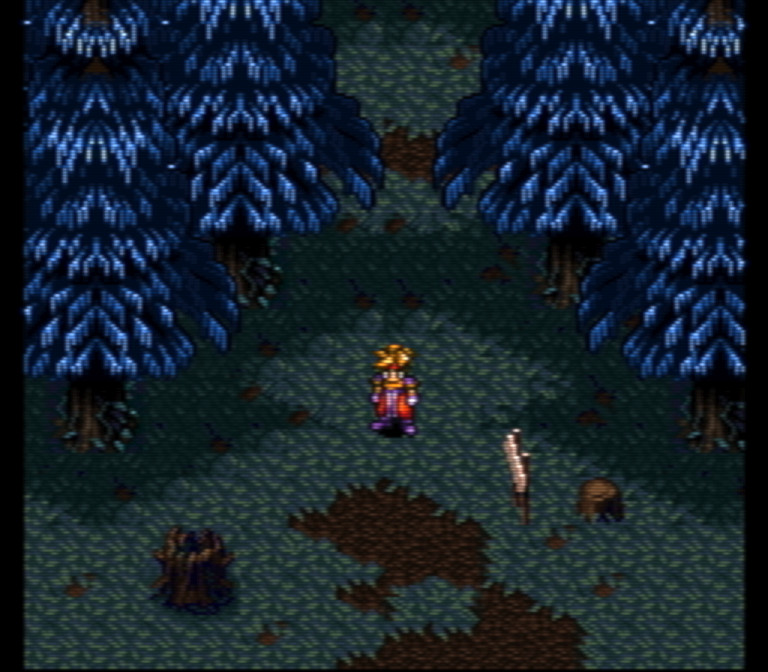
Now that this is out of the way, the promised juicy bits. Since RetroArch also supports shaders, we can use those to make things look a little more retro. RetroArch comes with a few existing shaders and presets already, which is super lucky for me, because I have no clue how to write shaders. I am a programmer, but shaders are just something I haven’t even dipped my toes into yet. The existing ones actually include everything we need. Most importantly, a shader that emulates NTSC. Let’s take a quick look at how much this already improves the visuals in, say, TLoZ: A Link to the Past:

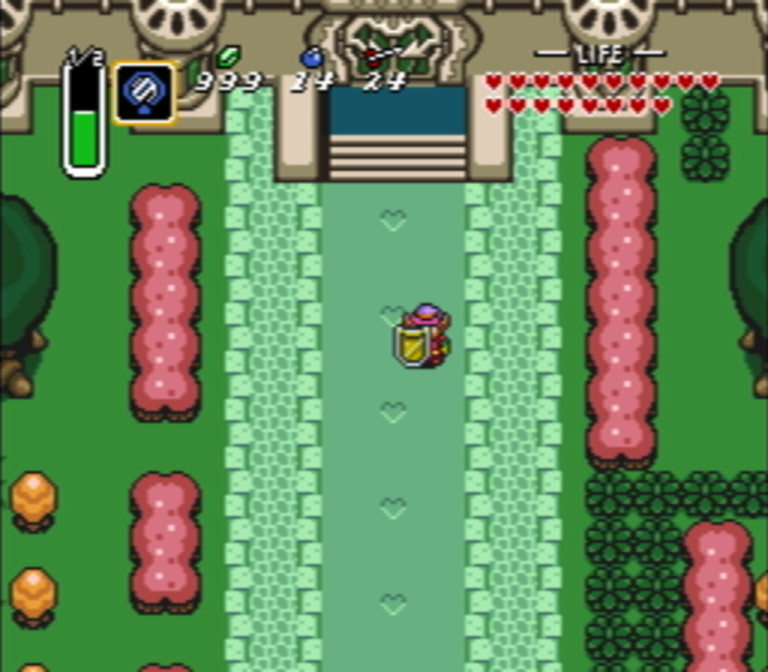
That’s quite a big difference already, wouldn’t you say? I should mention I’ve also enabled bilinear filtering in the video settings of RetroArch, because the result looks a bit strange otherwise. We’re going to leave this on from now on, too. Anyway, taking another look at the screenshot with the NTSC shader enabled, colors are already looking more like they did back in the day, and it’s blurrier, too. Let’s add some more “retro” to it with some scan lines:

This was easy enough, because the NTSC + scan lines combination also exists as a preset in RetroArch. I believe these NTSC shaders (and probably many of the others RetroArch ships with) were initially written by Themaister, who had also kicked off development of RetroArch back during its inception. Thank you!
Anyway, we now have a more faithful color representation and some scan lines. This already looks a lot better, at least in my opinion. But there always seemed to be something missing. A few months back I was looking at some photos of CRTs and it hit me: many of them had quite some “glow” to them. Bright colors would bleed into their surroundings a little. You wouldn’t usually want this, but I feel that it creates an effect that looks pretty charming with these older games. I fiddled around a bit with the shader settings in RetroArch, and eventually came up with a satisfying result:
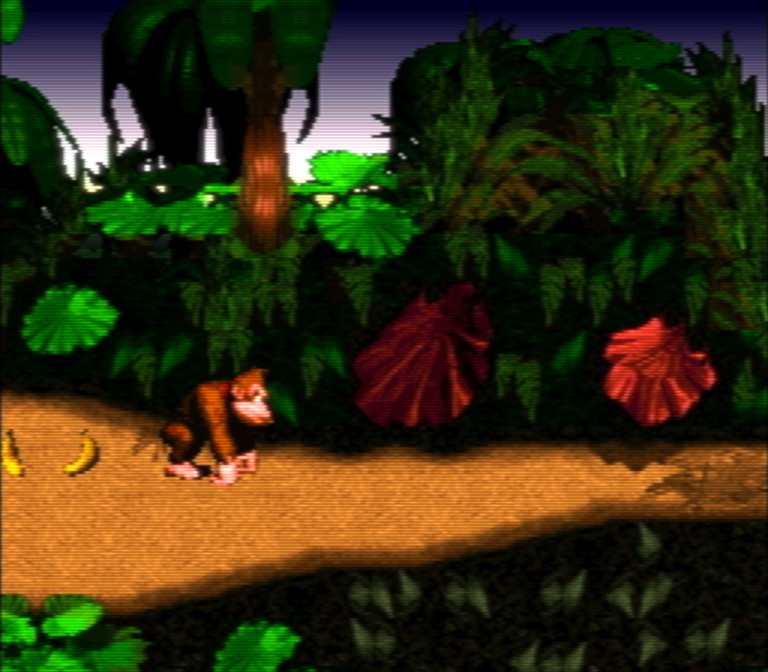
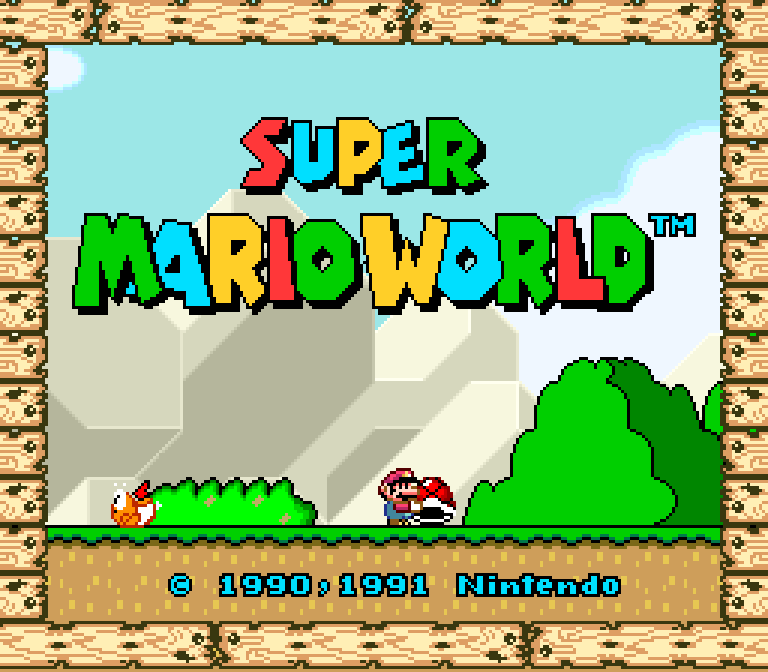
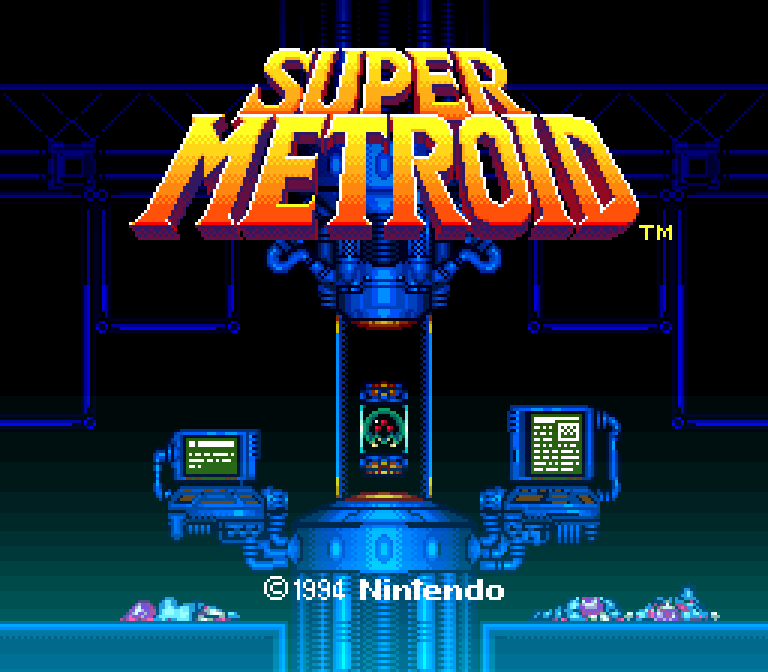
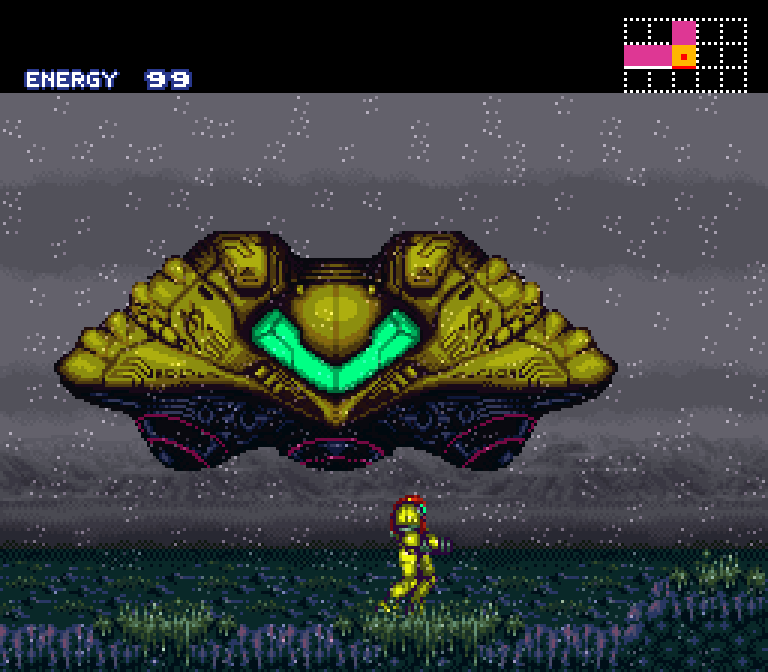
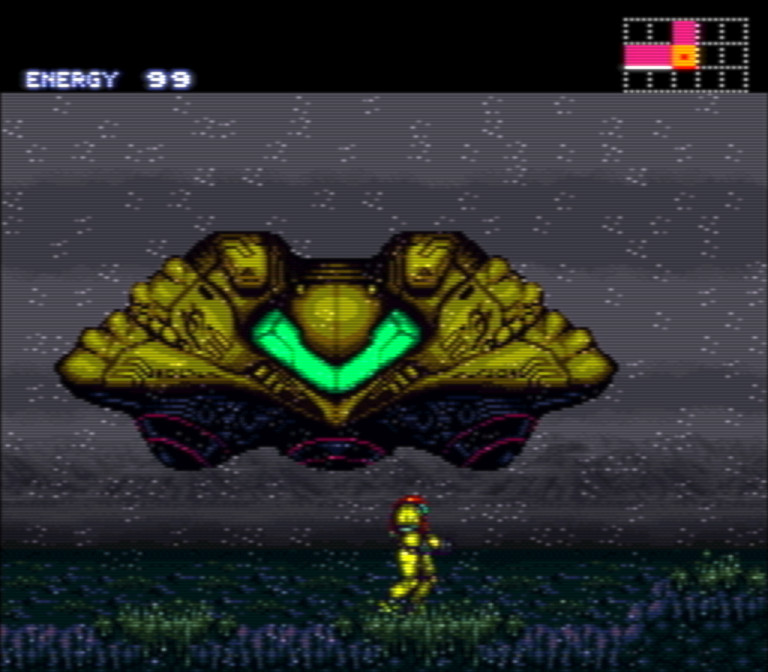
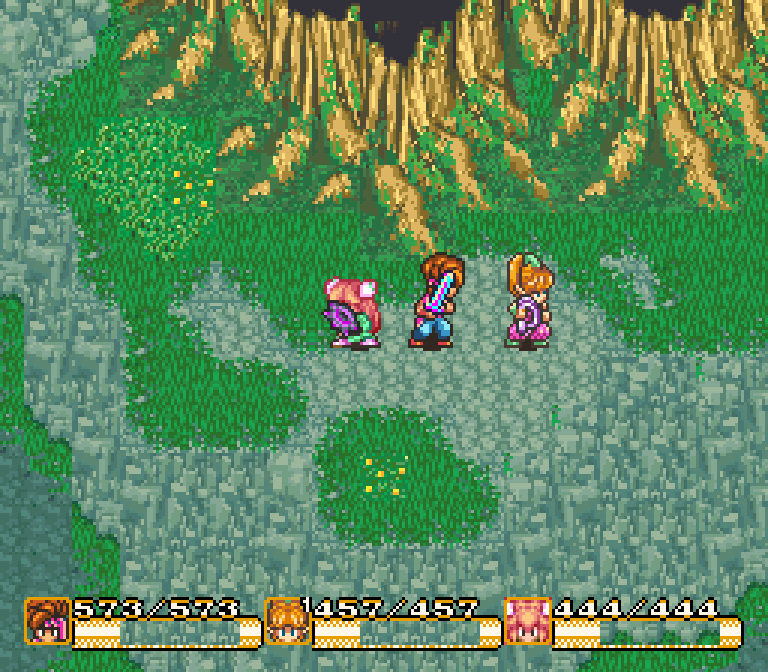
Isn’t it pretty? If you’ve answered “no” to this question, I get it. It isn’t for everyone. Some people prefer the crisp look, even though games from the days of the SNES weren’t made with that in mind. At the end of the day, it’s still your choice how you enjoy the classics ;) If you do enjoy the way this looks, or if you’re not yet convinced, take a look at a few more screenshots from some different games:

Using my shader preset
Want on board? It’s not complicated. Grab my shader preset from this link and save the file inside your RetroArch/shaders directory. There should be a shaders_slang folder inside that directory already, just put the .slangp file beside it. Next, fire up RetroArch and navigate to Settings → Video → Output. Make sure Video in this submenu is set to one of vulkan, glcore, d3d11 or d3d12. The default of gl is an older version of OpenGL that does not support the Slang shader language. Afterwards, enable bilinear filtering in Settings → Video towards the bottom. If you had to switch the video mode (away from gl), you should restart RetroArch now.
Next, start a game of your choice and bring up RetroArch’s quick menu via F1 or a dedicated button on your controller. Select Shaders and make sure they’re enabled, then select Load and find the .slangp file you have downloaded; it should be immediately visible. Afterwards, just close the quick menu, and you should be all set! If you would like to skip this setup in the future, you can select Save in the Shaders submenu and select Save Core Preset to always use the shader preset with this core, or Save Global Preset to always use it for every core.
A note on PS1 and other higher resolution systems
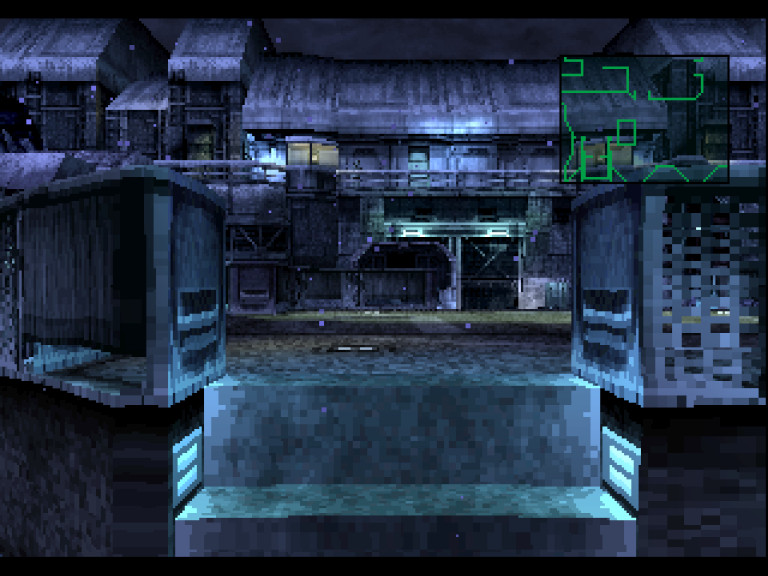
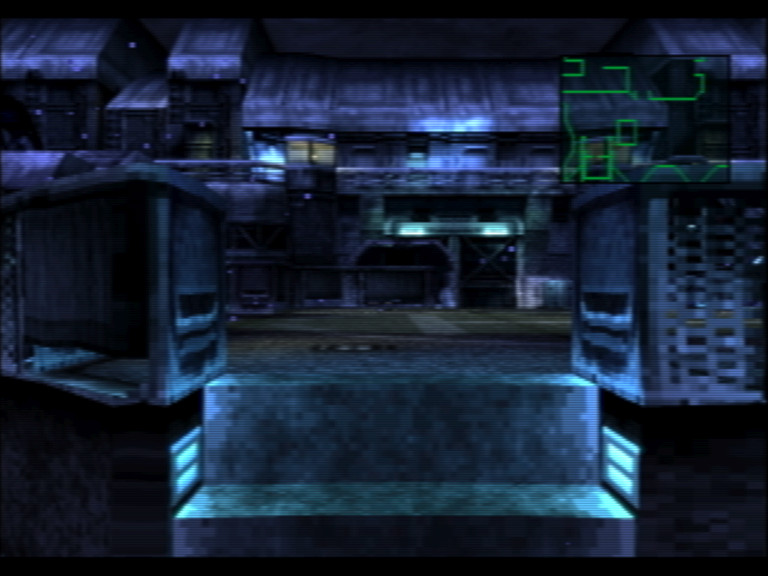
One big benefit of emulating the PS1 or other 3D consoles is that you can increase the resolution. It will not improve the textures, but a higher resolution is certainly more appealing than the low resolution these systems were running at originally. Sadly, it doesn’t mix well with the NTSC shader preset. The scanlines will be so thin you will barely see them, and the effect of emulating NTSC at high resolutions will also be lost almost entirely. Luckily, there is a nice compromise in some cores of RetroArch: supersampling! The concept is the same as in modern games: everything is being rendered at a higher resolution, and then scaled down to the original resolution of the console that is being emulated. As an example, you can enable supersampling in Beetle PSX via Quick Menu → Options → Supersampling. Here’s how the NTSC shader preset combined with supersampling looks compared to no shaders and no bilinear filtering at the original resolution in Metal Gear Solid: